Comprehensive Guide To Lutron Dimmer Switch Install: Transform Your Lighting With Ease
Installing a Lutron dimmer switch can significantly enhance your home's ambiance and energy efficiency. Whether you're a DIY enthusiast or hiring a professional, this guide will walk you through every step of the process. From understanding the basics to advanced installation tips, we've got you covered.
Lighting plays a crucial role in creating the perfect atmosphere in your home. With a Lutron dimmer switch install, you can control the brightness of your lights effortlessly. This flexibility not only improves the aesthetics of your space but also contributes to energy savings, making it an eco-friendly choice.
In this article, we'll delve into everything you need to know about Lutron dimmer switches. From choosing the right model to troubleshooting common issues, our goal is to provide you with actionable insights that make the installation process seamless and stress-free.
- Serenity Massage North Andover Ma
- Hotel The Hague Marriott
- Give Me The Number To Cricket Wireless
- Scott Peterson New Theory
- Why Is Cvs Charging Me 5 A Month
Table of Contents
- Introduction to Lutron Dimmer Switches
- Benefits of Installing Lutron Dimmer Switches
- Tools and Materials Needed for Installation
- Preparation Steps Before Installation
- Step-by-Step Guide to Installing a Lutron Dimmer Switch
- Common Issues and Troubleshooting Tips
- Compatibility with Smart Home Systems
- Energy Savings and Environmental Impact
- Maintenance Tips for Lutron Dimmer Switches
- Conclusion and Final Thoughts
Introduction to Lutron Dimmer Switches
Lutron dimmer switches have become a staple in modern homes due to their versatility and functionality. These switches allow you to adjust the intensity of your lighting, creating the perfect mood for any occasion. From dimming lights for a cozy evening to brightening up your workspace, Lutron offers a range of products to suit different needs.
Why Choose Lutron?
One of the primary reasons homeowners opt for Lutron dimmer switches is their reputation for quality and reliability. Lutron has been a leader in the lighting control industry for over 50 years, consistently delivering innovative solutions that enhance the user experience. Their products are designed with precision, ensuring smooth operation and long-lasting performance.
Another advantage of Lutron dimmer switches is their compatibility with various lighting types, including LED, incandescent, and halogen bulbs. This versatility makes them suitable for a wide range of applications, from residential spaces to commercial environments.
- Alexs Brother In Lufe Is Strange
- Las Vegas Hotel Mgm Grand Pictures
- El Jefe Taqueria Boston
- Writers Only Murders In The Building
- Animal Hospital In Crystal Lake Il
Benefits of Installing Lutron Dimmer Switches
Installing a Lutron dimmer switch offers numerous benefits beyond just controlling light levels. Here are some key advantages:
- Energy Efficiency: Dimming your lights can reduce energy consumption, leading to lower electricity bills.
- Extended Bulb Life: By operating bulbs at lower intensities, you can significantly increase their lifespan.
- Enhanced Mood Lighting: Create the perfect ambiance for any setting by adjusting the brightness of your lights.
- Smart Home Integration: Many Lutron dimmer switches are compatible with smart home systems, allowing for remote control and automation.
These benefits make Lutron dimmer switches an attractive option for homeowners looking to upgrade their lighting systems.
Tools and Materials Needed for Installation
Before starting the installation process, it's essential to gather all the necessary tools and materials. Here's a list of what you'll need:
- Lutron dimmer switch (model of your choice)
- Screwdriver (Phillips and flathead)
- Voltage tester
- Wire strippers
- Electrical tape
- Wire nuts
Having these tools on hand will ensure a smooth and efficient installation process.
Preparation Steps Before Installation
Proper preparation is key to a successful Lutron dimmer switch install. Follow these steps to get ready:
Step 1: Turn Off Power
Safety should always be your top priority when working with electrical components. Before starting the installation, turn off the power to the circuit at your home's breaker panel. Use a voltage tester to confirm that the power is off before proceeding.
Step 2: Remove the Old Switch
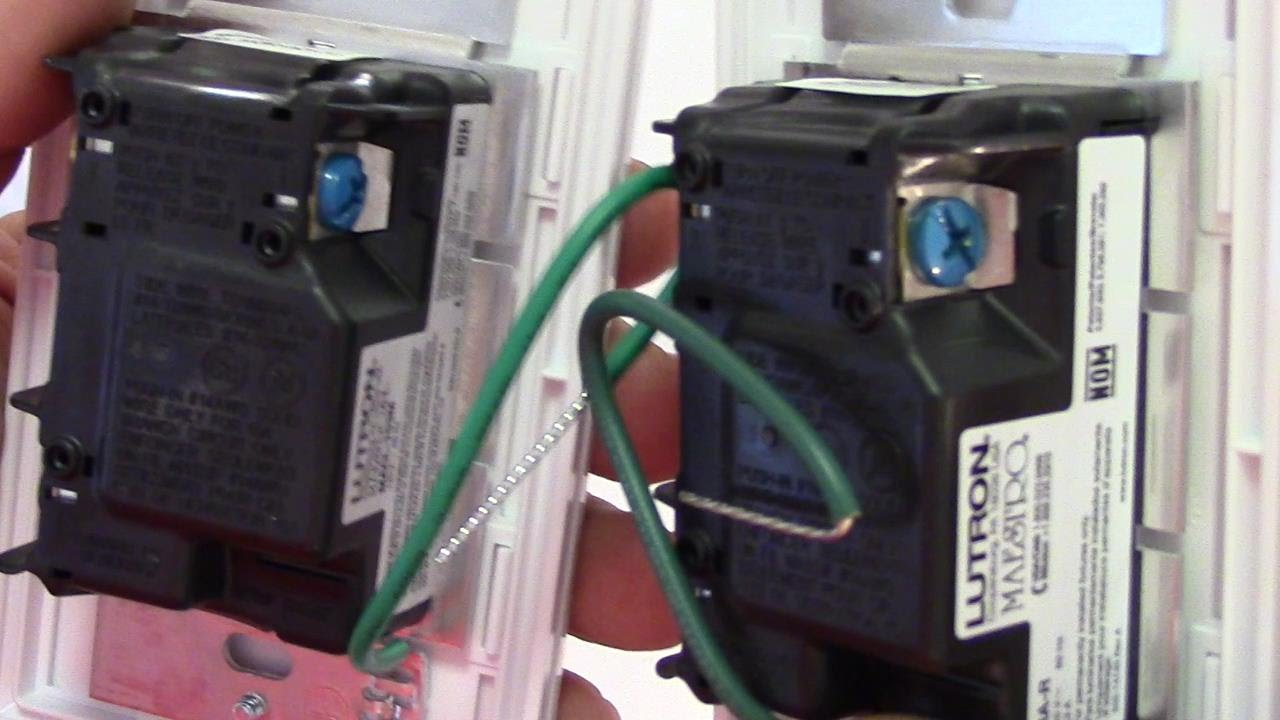
Using a screwdriver, carefully remove the cover plate and unscrew the existing switch from the wall. Gently pull the switch out of the box to expose the wiring.
Step 3: Identify Wires
Take note of how the wires are connected to the old switch. Most switches will have two or three wires attached, along with a ground wire. Labeling the wires can help you avoid confusion during the installation process.
Step-by-Step Guide to Installing a Lutron Dimmer Switch
Now that you're prepared, it's time to install your Lutron dimmer switch. Follow these steps for a successful installation:
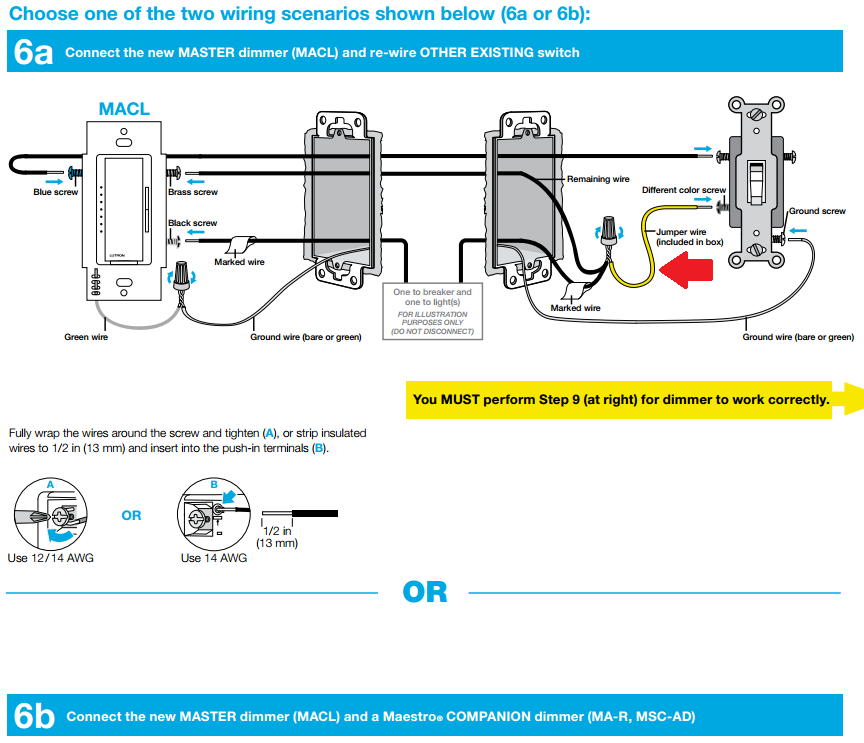
Step 1: Connect the Ground Wire
Attach the ground wire from the electrical box to the green screw on the dimmer switch. Ensure the connection is secure by tightening the screw.
Step 2: Connect the Hot Wires
Identify the hot wires (usually black or red) and connect them to the corresponding screws on the dimmer switch. Use wire nuts to secure the connections and wrap them with electrical tape for added safety.
Step 3: Secure the Dimmer Switch
Once all the wires are connected, carefully push the dimmer switch back into the electrical box. Screw it securely into place and attach the cover plate.
Step 4: Restore Power and Test
Return to the breaker panel and restore power to the circuit. Test the dimmer switch to ensure it's functioning properly. Adjust the settings as needed to achieve your desired lighting levels.
Common Issues and Troubleshooting Tips
Even with careful installation, issues can arise. Here are some common problems and how to address them:
- Dimmer Doesn't Work: Double-check all connections and ensure the power is restored. Verify that the dimmer switch is compatible with your lighting type.
- Humming Noise: This can occur if the dimmer is not compatible with the bulb type. Replace the bulbs with ones that are compatible with dimmer switches.
- Overheating: Ensure the dimmer switch is not overloaded. Check the wattage rating and avoid exceeding the recommended load.
If these troubleshooting tips don't resolve the issue, consult the Lutron user manual or contact customer support for further assistance.
Compatibility with Smart Home Systems
Many Lutron dimmer switches are designed to integrate seamlessly with smart home systems. This allows you to control your lighting remotely using a smartphone app or voice commands through devices like Amazon Alexa or Google Assistant. Some popular models include:
- Caseta Wireless Dimmer Switch
- Pico Wireless Remote
- HomeWorks QS System
These smart features provide convenience and flexibility, making it easier to manage your home's lighting from anywhere.
Energy Savings and Environmental Impact
Installing a Lutron dimmer switch can have a significant positive impact on your energy consumption and the environment. By reducing the power used by your lights, you can lower your carbon footprint and contribute to a more sustainable future. Studies have shown that dimming lights by just 10% can result in a 10% reduction in energy use, while dimming by 50% can save up to 40%.
Additionally, using dimmer switches can extend the life of your bulbs, reducing the need for frequent replacements and minimizing waste.
Maintenance Tips for Lutron Dimmer Switches
To ensure your Lutron dimmer switch continues to function optimally, follow these maintenance tips:
- Regularly clean the switch and surrounding area to prevent dust buildup.
- Check connections periodically to ensure they remain secure.
- Replace bulbs promptly if they burn out to avoid overloading the dimmer switch.
- Refer to the user manual for specific maintenance instructions tailored to your model.
By following these guidelines, you can maximize the lifespan and performance of your Lutron dimmer switch.
Conclusion and Final Thoughts
A Lutron dimmer switch install can transform the way you control and enjoy your home's lighting. With their energy-saving capabilities, enhanced functionality, and compatibility with smart home systems, these switches offer a wide range of benefits for modern homeowners. By following the steps outlined in this guide, you can confidently tackle the installation process and enjoy the advantages of a Lutron dimmer switch.
We encourage you to share your thoughts and experiences in the comments section below. Have you installed a Lutron dimmer switch? What challenges did you face, and how did you overcome them? Don't forget to explore our other articles for more tips and insights on home improvement and technology.
Source: Lutron Official Website
- Kebek 3 Old Orchard Beach Maine
- Heritage Mental Health Clinic
- The Ridge Restaurant The Hotel Belvidere Hawley Photos
- Woodinville Department Of Licensing
- Miranda Lambert Country Music Awards
How To Install The Lutron Digital Dimmer Kit As A 3Way Switch Lutron

install lutron toggle dimmer switch Install lutron diva dimmer switch
install lutron toggle dimmer switch Install lutron diva dimmer switch
